
How to Find Ceiling Joists: 5 Ways That Actually Work
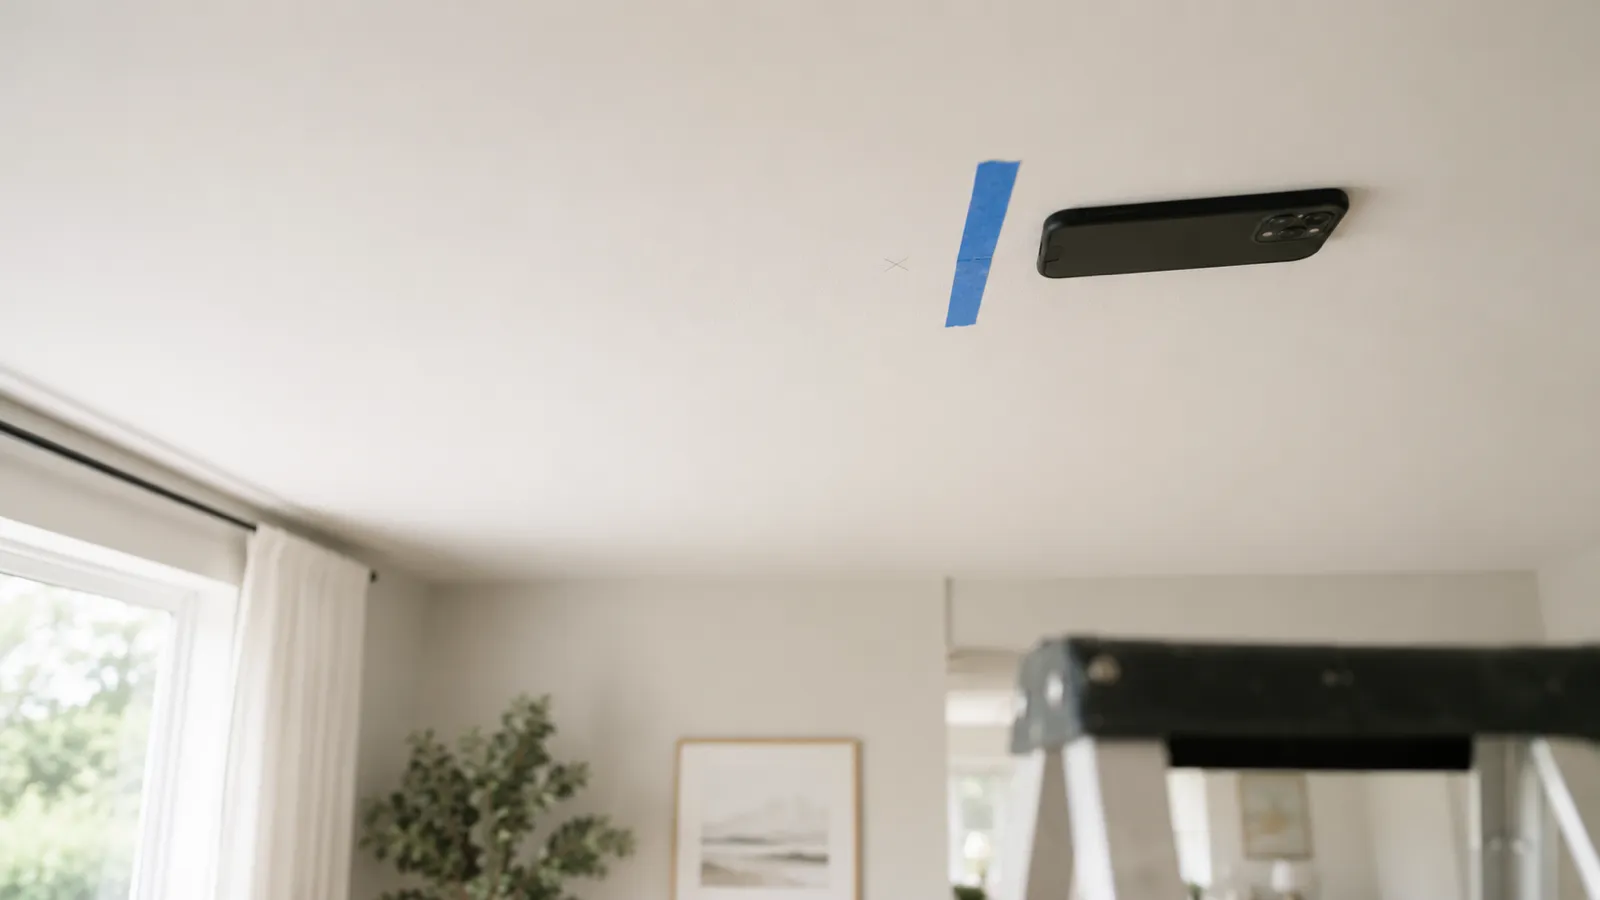
How to find ceiling joists: the short answer
A ceiling joist is just a stud lying on its side. Same lumber, same 16-inch or 24-inch on-center spacing, and — this is the part that matters — the same drywall screws holding the same drywall to it. That means every trick that finds a wall stud finds a ceiling joist. Sweep a stud finder app across the ceiling and it spikes over the screw heads; drag a magnet and it grabs in the same spots; run an electronic finder overhead and it reads the density change. And because joists run parallel at a fixed spacing, finding one tells you where all the rest are.
Here’s how the five methods stack up:
| Method | Cost | Best for | Weak spot |
|---|---|---|---|
| Stud finder app | Free to try | Fast checks, textured ceilings | Reads fasteners, not wood |
| Rare-earth magnet | A few dollars | Confirming a screw line | Slow to search a whole ceiling |
| Electronic stud finder | $10–$50 | Reading the full joist width | Awkward to calibrate overhead |
| Tape measure from wall | Free | Predicting the whole layout | Assumes standard spacing |
| Knock test / attic check | Free | Verification | Knock is vague; attics are hot |
Use one method to find, and a second to confirm. Overhead, that habit isn’t optional — it’s the difference between a ceiling fan that stays up and one that doesn’t.
Method 1: a stud finder app on the ceiling
This is the method most people don’t realize works overhead — and it works exactly as well as it does on a wall. Your phone’s magnetometer doesn’t care about gravity; it reacts to the steel drywall screws driven through the ceiling into each joist, roughly every 12 inches along the board. To be clear about what’s happening: the app detects the metal fasteners in the joist, not the wood itself. That’s not a limitation here — the screws only exist where the joist is, so a line of magnetometer spikes is the joist.
The overhead technique, adapted from how to use a stud finder:
- Calibrate away from the ceiling — hold the phone in open air, no magnetic case.
- Hold the phone flat against the ceiling, screen down, and sweep slowly — about an inch per second — perpendicular to the direction you think the joists run. (Not sure? Sweep both ways; only one direction will cross them.)
- Mark each spike with a pencil. One spike is a screw; it could be a stray.
- Sweep a parallel pass a foot or two away. When spikes from both passes line up in a straight row, that row is your joist.
- Measure 16 inches over and confirm the next joist. If it’s not at 16, check 24.
Two honest caveats. If your ceiling is plaster over wood lath, the fasteners are smaller nails at odd spots, and readings get noisy — the app can still work, but expect to hunt. And recessed lights, metal HVAC boots, and ceiling boxes will all spike the magnetometer, so ignore readings within a few inches of any fixture. Curious what the sensor is actually doing? See how the app works.
If you searched for a “beam finder app” or “joist finder app,” this is it — same sensor, same physics, just pointed up.
Method 2: a rare-earth magnet
The zero-tech version of the same physics. A neodymium magnet — the small disc kind, a few dollars at any hardware store — sticks to the ceiling wherever there’s a drywall screw underneath the paint. Tie it to a length of dental floss and drift it across the ceiling; when it snaps flat against the surface, you’ve found a fastener, and the joist is directly behind it.
It’s slower than an app because you’re hunting individual screw heads across a big surface with no readout, and holding your arms overhead gets old fast. But it never needs a battery, never gives a false density reading, and it’s a great confirmation tool: once the app says “joist here,” a magnet grabbing on the same line settles it. As with the app, find at least two fasteners in a row before you trust the line.
Methods 3, 4, and 5: finder, tape measure, knock
Electronic stud finder, held overhead. A capacitive finder reads the density difference between hollow cavity and solid joist, so it shows you the full width of the lumber rather than individual screws. The catch is ergonomics: you have to calibrate over a hollow spot on the ceiling while holding the tool flat and steady above your head, and any wobble ruins the reading. It works — plenty of electricians do it daily — but expect a couple of recalibrations before you get a clean pass.
Measure from the wall. Framing is predictable, and you can exploit that. Joists typically run perpendicular to the roof ridge, spanning the shorter dimension of the room, and they’re laid out 16 inches on center in most US homes (24 inches with truss framing). The first joist usually sits with its edge at the wall, so measure out and mark at 16-inch intervals: 16, 32, 48, 64. These marks are hypotheses, not answers — layouts shift around chimneys, stairs, and openings — but they tell you exactly where to point a magnet or an app, which turns a whole-ceiling search into a 30-second check.
Knock, then check the attic. Rap the ceiling with a knuckle: hollow and drummy between joists, dull and solid on one. It’s imprecise — think “within a few inches,” not “drill here” — but it’s free and instant. If the room below an attic is the one you’re working on, you have the cheat code: go up, and the joists are sitting right there in plain sight. Measure from a reference point you can find in both places (a chimney, a vent pipe, the attic hatch itself) and transfer the measurement to the ceiling below.
Joists, trusses, and beams: what’s actually up there
Three terms get mixed up, and one of them changes your spacing assumption:
- Ceiling joists are horizontal framing lumber — usually 2x6 to 2x10 — that carry the ceiling below and sometimes a floor above. Standard spacing: 16 inches on center, sometimes 24.
- Trusses are prefabricated triangulated frames common in homes built since the 1960s. The bottom chord of the truss does the joist’s job — the drywall screws into it — and trusses almost always sit at 24 inches on center, not 16. If your 16-inch measurement keeps missing, you probably have trusses.
- Beams are the bigger members that joists themselves rest on. If you’re in the UK or Australia and searching for “ceiling beams” or “ceiling timbers,” what you’re hanging into is almost always what US framing calls a joist — the detection methods are identical.
For finding purposes, none of this changes the game: all three hold drywall with steel fasteners, so an app, a magnet, and a finder detect all of them. It only changes what spacing to expect and how much weight the member can take.
One wall type deserves its own warning: plaster ceilings. Old lath-and-plaster is thicker and lumpier than drywall, electronic finders misread it constantly, and the lath nails are small. Overhead plaster is the hardest case in the house — lean on the tape-measure layout and the attic check, and verify with a small pilot hole before committing to hardware.
Why this matters more overhead than on a wall
A picture that pulls out of a wall falls a foot and dents the baseboard. A ceiling fan that pulls out of a ceiling falls on whatever — or whoever — is under it. That’s the whole reason to be more careful finding ceiling joists than wall studs: everything you hang overhead is a falling hazard, and drywall alone holds almost nothing in tension. A toggle bolt rated for 50 pounds on a wall is doing a different, harder job when the load hangs straight down off the ceiling.
So match the job to the framing:
- Ceiling fans (15–50 lbs): into a joist or a fan-rated brace box spanning two joists. Never a plastic box, never drywall anchors.
- Pull-up bars and swings: these see dynamic load — a 180-pound person pulling up puts well more than 180 pounds on the mount. Lag screws into the center of a joist, at least 2 inches of thread in the wood.
- Hanging plants and light fixtures (under 10 lbs): still aim for a joist. A screw-in hook into wood beats any anchor in bare drywall.
Whatever you find the joist with, verify before the real hardware goes in: drill a 1/16-inch pilot hole where you plan to mount. Wood shavings on the bit means you’re in the joist; white dust and no resistance means you’re in the cavity, and the hole you just made is small enough to spackle in ten seconds. Find with the app or the tape, confirm with the magnet or the pilot hole, and hang it once.
Frequently asked questions

Stud Finder App vs Walabot: Which Do You Actually Need?
Stud finder app vs Walabot — one is free and lives on your phone, the other is a paid imaging device that sees pipes and wires. An honest comparison of what each finds, and which fits your job.
Stud Finder for Plaster Walls: What Works and What Doesn't
Plaster-and-lath walls defeat most stud finders, apps included. Why plaster is so hard, what actually finds studs behind it, and how to fix a stud finder that's not finding studs.
See behind the wall,
now in your pocket.
Stud Finder turns your phone into a precision wall scanner. Know where the studs, screws and pipes are before you drill.
Download the App